The post Desktop Automation Step By Step appeared first on TestMate.
]]>For all those who are looking for a free option to automate desktop applications, Testmate can be of imminent help.
Testmate is a VBScript based tool that simplifies the automation process for various applications (restricting our scope to only desktop applications such as .net, win32 & WPF in this article). It also provides inbuilt reporting and other framework components like OR etc.
Please find below the step by step guide to start with after you download Testmate:
1. Setting up Testmate
2. Knowing the reserved objects
3. Create objects for desktop application
4. Create the first test case Watch the video here
5. Object Repository
6. Automate calculator without Object repository
7. Set the main window as root to increase performance
Sample application and script
Download and extract the sample code below and copy it directly under C:
(To avoid any configuration, extract as C:\Sample or else manually change the path in config.xml file)
Then run it using testmate
The post Desktop Automation Step By Step appeared first on TestMate.
]]>The post UI Automation | Set Root For AUT appeared first on TestMate.
]]>'Declare the root object
oWindow = "Window,Name::Calculator"
'By using this , the hierarchy can be skipped as below
oTwo = "Button,Name::Two"
oThree = "Button,Name::Three"
oFour = "Button,Name::Four"
oResult = "Text,AutomationId::CalculatorResults"
'Open Calculator App
Set oShell = CreateObject("Wscript.shell")
oShell.Run "Calc"
'Wait for the button to show up
bSync = uia.Exist(oWindow)
util.Wait(1)
'Set the parent window as root - This will improve the script performance
'All the objects will be located considering this window as root instead of desktop
uia.SetRoot oWindow
'Set algorithm to search anywhere under root
uia.SearchElementBySubtree()
'Click on 2,3,4 buttons
uia.Click oTwo
uia.Click oThree
uia.Click oFour
'Fetch the result
sText = uia.GetProperty(oResult,"Name")
'Make validation
If sText="Display is 234" Then
Logger.Pass "Step1", "Calculator displays correct result", True
Else
Logger.Fail "Step1", "Calculator displays incorrect result as" & sText, True
End If
'Set the desktop as the default Parent
uia.ResetRoot
The post UI Automation | Set Root For AUT appeared first on TestMate.
]]>The post Chapter 8 – Execution From VBScript appeared first on TestMate.
]]>VBScript
'Create Shell Object using vbscript
 Set obj = CreateObject("Wscript.Shell")

'Run the shell command with parameters
 obj.Run """C:\Testmate \TesterAt.exe""    ""c:\TestPath\Testname.jts"""
The execution takes place in the tool (invisible mode) and results are reported in the report path configured in the config.xml.
The post Chapter 8 – Execution From VBScript appeared first on TestMate.
]]>The post Chapter 7 – Execution From Command Line appeared first on TestMate.
]]>E.g.
C:\Testmate >TesterAt.exe c:\TestPath\Testname.jts
The Execution takes place with the tool in invisible mode and results are reported in the report path configured in the config.xml.
The post Chapter 7 – Execution From Command Line appeared first on TestMate.
]]>The post Chapter 6 – Create a Test appeared first on TestMate.
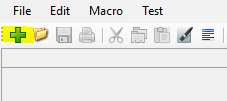
]]>1. Launch Testmate and click on ‘ + ’ (New) button to create a new test
2. Write the code as you would like and click on the save button
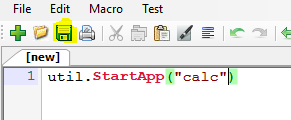
3. Save the file in .jts format. Remember the scripts can be only be saved as .jts format and libraries can only be saved as .vbs format

Now you can run the script using Play button on the toolbar.
The post Chapter 6 – Create a Test appeared first on TestMate.
]]>The post Chapter 5 – Object Repository appeared first on TestMate.
]]>Object Repository or as we say ‘OR’ is an XML file that contains the description of objects. The OR path has to be specified in the config file.
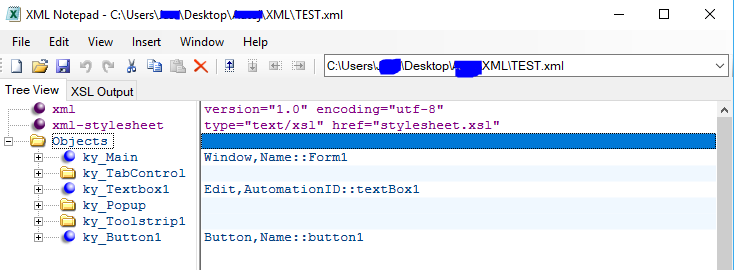
Although you can use Notepad, it is recommended to use Microsoft XML Notepad (free to download ) to work on config file. The above OR in Notepad looks as below:

Note: IntelliSense for the keywords in OR is automatically added to the test scripts upon adding an entry in the config file.
The post Chapter 5 – Object Repository appeared first on TestMate.
]]>The post Chapter 4 – Object String | Webdriver appeared first on TestMate.
]]>Object String is a string that is used to identify an automation object based on its attributes and hierarchy. In a Webdriver, we have following locators to identify an object:
- XPath
- Id
- Name
- TagName
- ClassName
- CssSelector
- LinkText
- PartialLinkText
The object string for webdriver has the following format:
<Locator>::valueThe object string for the search button on google will be “name::btnG” e.g. wd.Click “name::btnG”
Nested Objects
Nested objects are the child objects which lie under some parent object. The object string for the nested object has the following format:<Locator(Parent)>::value>==><Locator(Child)>::value
e.g. “name::Parent>==>id::child”
Index
When the object string points to more than one object then we can use the concept of index.
e.g. wd.Click “name::btnG,index::1”
Note: index starts from 0
The post Chapter 4 – Object String | Webdriver appeared first on TestMate.
]]>The post Chapter 3 – Object String | UIA appeared first on TestMate.
]]>Object String is a string which is used to identify an automation object based on its attributes and hierarchy in a particular application. Any tool can be used for object identification, ‘Microsoft Inspect’ is the recommended tool. (You can download it for free from Microsoft’s website. It also comes bundled with windows SDK)
The object string has the following format:
<Control Type>,Property::value>==><Control Type>,Property::value
Example: Consider the windows calculator as a sample application and Inspect as an object spying tool.
(Finding object string for ‘%’ button below)
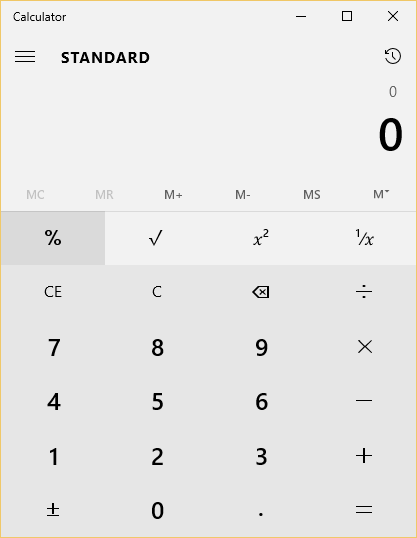
Step 1:
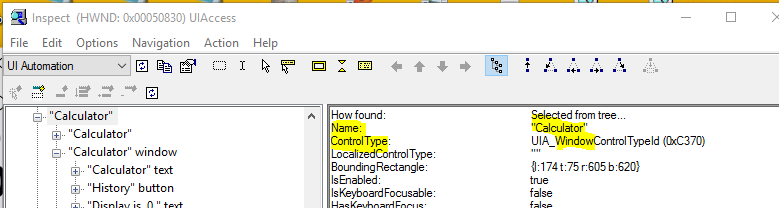
Control Type = Window & Name = Calculator
Object string here for the outer window will be
“Window,Name::Calculator”
Step 2:

Going down in hierarchy we again have :
Control Type = Window & Name = Calculator
So the object string for the inside window will again be:
“Window,Name::Calculator”
Combining both the strings we have:
“Window,Name::Calculator>==>Window,Name::Calculator”
Step 3:
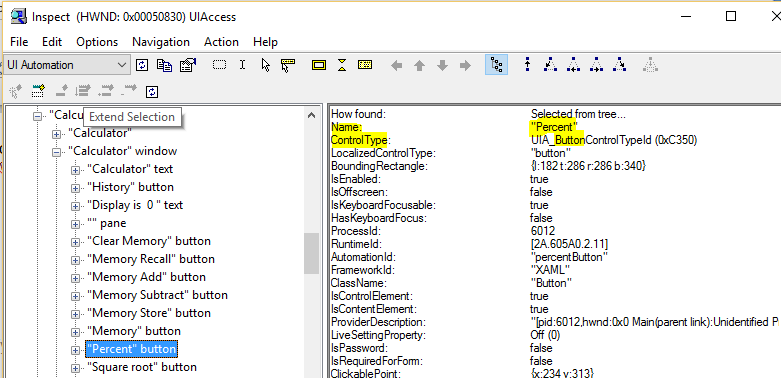
Control Type = Button & Name = Percent
The object string for the inside window will be:
“Button,Name::Percent”
Combining all the strings we have:
“Window,Name::Calculator>==>Window,Name::Calculator>==>Button,Name::Percent”
Now various actions can be performed on this button like click , doubleclick etc..
uia.Click “Window,Name::Calculator>==>Window,Name::Calculator,index::1,>==>Button,Name::Percent”
Properties
- Any unique property can be used for object identification.
- Multiple properties can be use separated by comma ‘,’
e.g. “Button,Name::Percent,AutomationId::percentButton”
Index
Index can be used in the cases where two elements have same properties.
e.g. “Button,Index::1”
Regular Expressions
Regular expressions can be used for objects with dynamic properties. It can be applied by adding ‘r|’ as a prefix to the property value.
e.g. “Window,Name::r|Cal.*”
Generic Control Type
If the control type is not known then a generic control type can be used as below:
e.g. “Object,Name::Calculator” Here ‘Window’ is replaced by ‘Object’.
Smart algorithm tries to find the element based on the other properties and ignores the control type. It can also be useful in the case when the actual application is not available.
The post Chapter 3 – Object String | UIA appeared first on TestMate.
]]>The post Chapter 2 – Reserved Objects appeared first on TestMate.
]]>To facilitate quicker automation a few objects have been reserved as below:
- uia : This object is used to interact with all the applications supported by UI Automation.
- wd: This is the reserved object for webdriver.
- native: This object can invoke all the native methods.
- util: This object is used to invoke various utility methods.
- dll: This object is used to invoke external DLL’s.
- oRep: This object is used to invoke methods for fetching data from the Object Repository.
- Logger: This free object is used to report Pass, Fail and other such scenario’s in the HTML report.
- app: This is the reserved object for Appium.
- Test: This object is used to batch run test cases.
- java: This object is reserved to interact with java swing applications
Using Objects
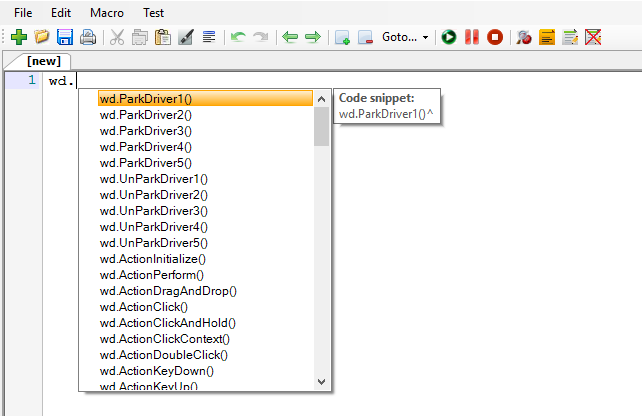
Upon typing the object name, all the methods in its class will be displayed in IntelliSense. You can select any method from it and mouse over it to get all the available overloaded methods and more help.
The post Chapter 2 – Reserved Objects appeared first on TestMate.
]]>